Monday, June 27, 2011

Summer pinwheels.....

Hi!  It's good to be back to my blog again, after being away a week.  No, I haven't completed the home renovations--they'll be gong on until mid-July.  But I am taking a minute today to post a card I made.  This one features a summer pinwheel.  If you've seen the new Stampin' Up! catalog, you know that there is now a stamp set with a pinwheel in it.  But I made this one using designer paper.
I made the pinwheel by starting with a 2.5" square.  I cut in from each corner most of the way (but not all the way) toward the center.  Then I folded those 4 corners in and glued them before putting a brad in the center.  I used a toothpick for the pinwheel "handle".
Here it the ribbon I ran across the striped designer paper to add more color.  The designer paper is from the Build-a-Bear Workshop Pawsitively Prints II pack.  (What a long name for a pack of paper!!)

I hope you like this little summer card.   Thanks for being patient with me during my house renovations when I'm not posting very often.  I will return to regular posting when all this is over!        
Smiles, Laura

Monday, June 20, 2011

Love those flowers.....

Today I thought I'd share another sample using the flowers punched with the Blossom Bouquet Triple Layer Punch.  Can't seem to get enough of these flowers. 
For this one, I cut a piece of Sunny Garden designer paper square and halved it diagonally.  That made my background. I used Pear Pizzazz for the card, layers with Poppy Parade.  I think the thing I like best is the dotted designer paper from the In Colors Pattern Stack.  Love those stacks!!  The sentiment is from the Great Friend set, which is retiring July 1.  Another set I'll really miss.

Thanks for stopping in today.  Smiles, Laura

Friday, June 17, 2011

On a Pedestal....

I know I've been gone awhile and I apologize from not posting something in the last week.  I am doing some renovations on the house and it has taken all my time.  The end isn't in sight yet, but by the end of July, I should be finished.  One of my friends asked if I was doing the work myself and yes, I am. She said when she says, "I'm doing renovations" it means she's hiring it done.  Well, I'm painting, installing new cabinets, putting up tile, and yes, I do the work myself, so it takes time.  On top of that, I'm doing alot of cleaning out.  Goodwill and I are getting to know each other by name!  ha!  That doesn't leave alot of time for my REAL passion, stamping and creating. 

But I do have a card to share today.  This one uses the On a Pedestal stamp set which is retiring, unfortunately.  I love the sentiment "Happy Everything to you!"  That's such a useful stamp!!

This card had three circles, one inside the other.  Each is layered on a contrasting color, so it looks like even more circles. 
Here is a close-up of the circles and the butterfly.  This is another card my friend Judy and I made on our last play day, so she had the butterflies that I could stick on. 
Look at this neat bow Judy tied for me.  She has one of the bow-makers you see folks using.  I am having one made for me so I can make my own pretty bows!!
Thanks for faithfully stopping by my blog. I'll try to do better posting some samples for your enjoyment!!
Smiles, Laura

Tuesday, June 7, 2011

Three for the price of one!

Today I am sharing 3 cards with you.  They are the same layout, but open differently and are different sizes.  So you get three for the price of one. 

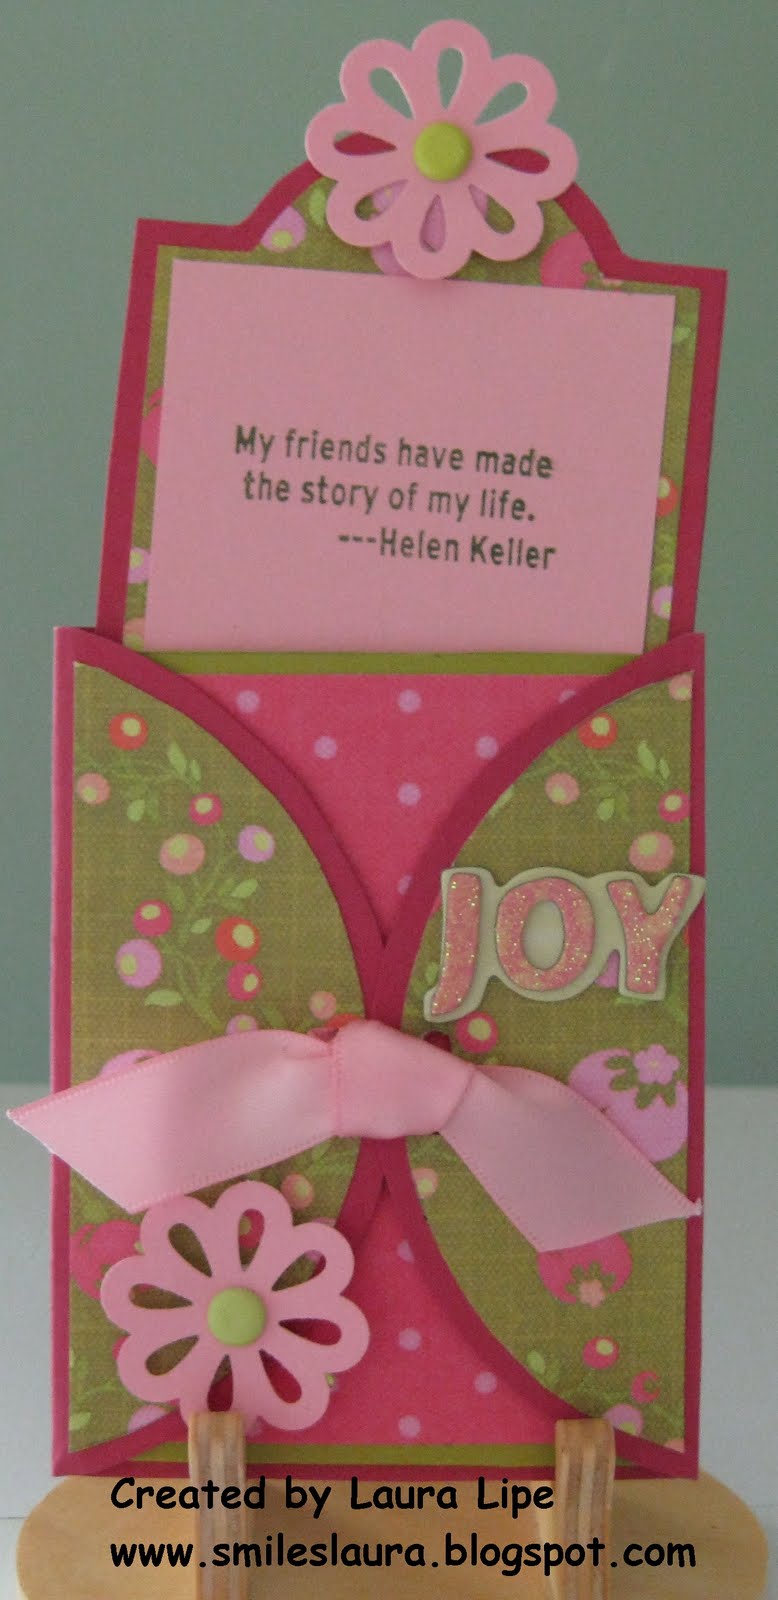
This first one is a small card, about 3.5" x 2.5".  My friend Judy gave me the template and we made cards by it one day when we were playing.    I used Stampin' Up! cardstock in Rose Red, Old Olive and Pink Pirouette  for this one and none SU designer paper.
 Inside there is a pocket which holds a little card that pulls out.  I used the new Blossom \Bouquet Triple Layer Punch for the flowers.  The top one gives you something by which to pull out the middle.
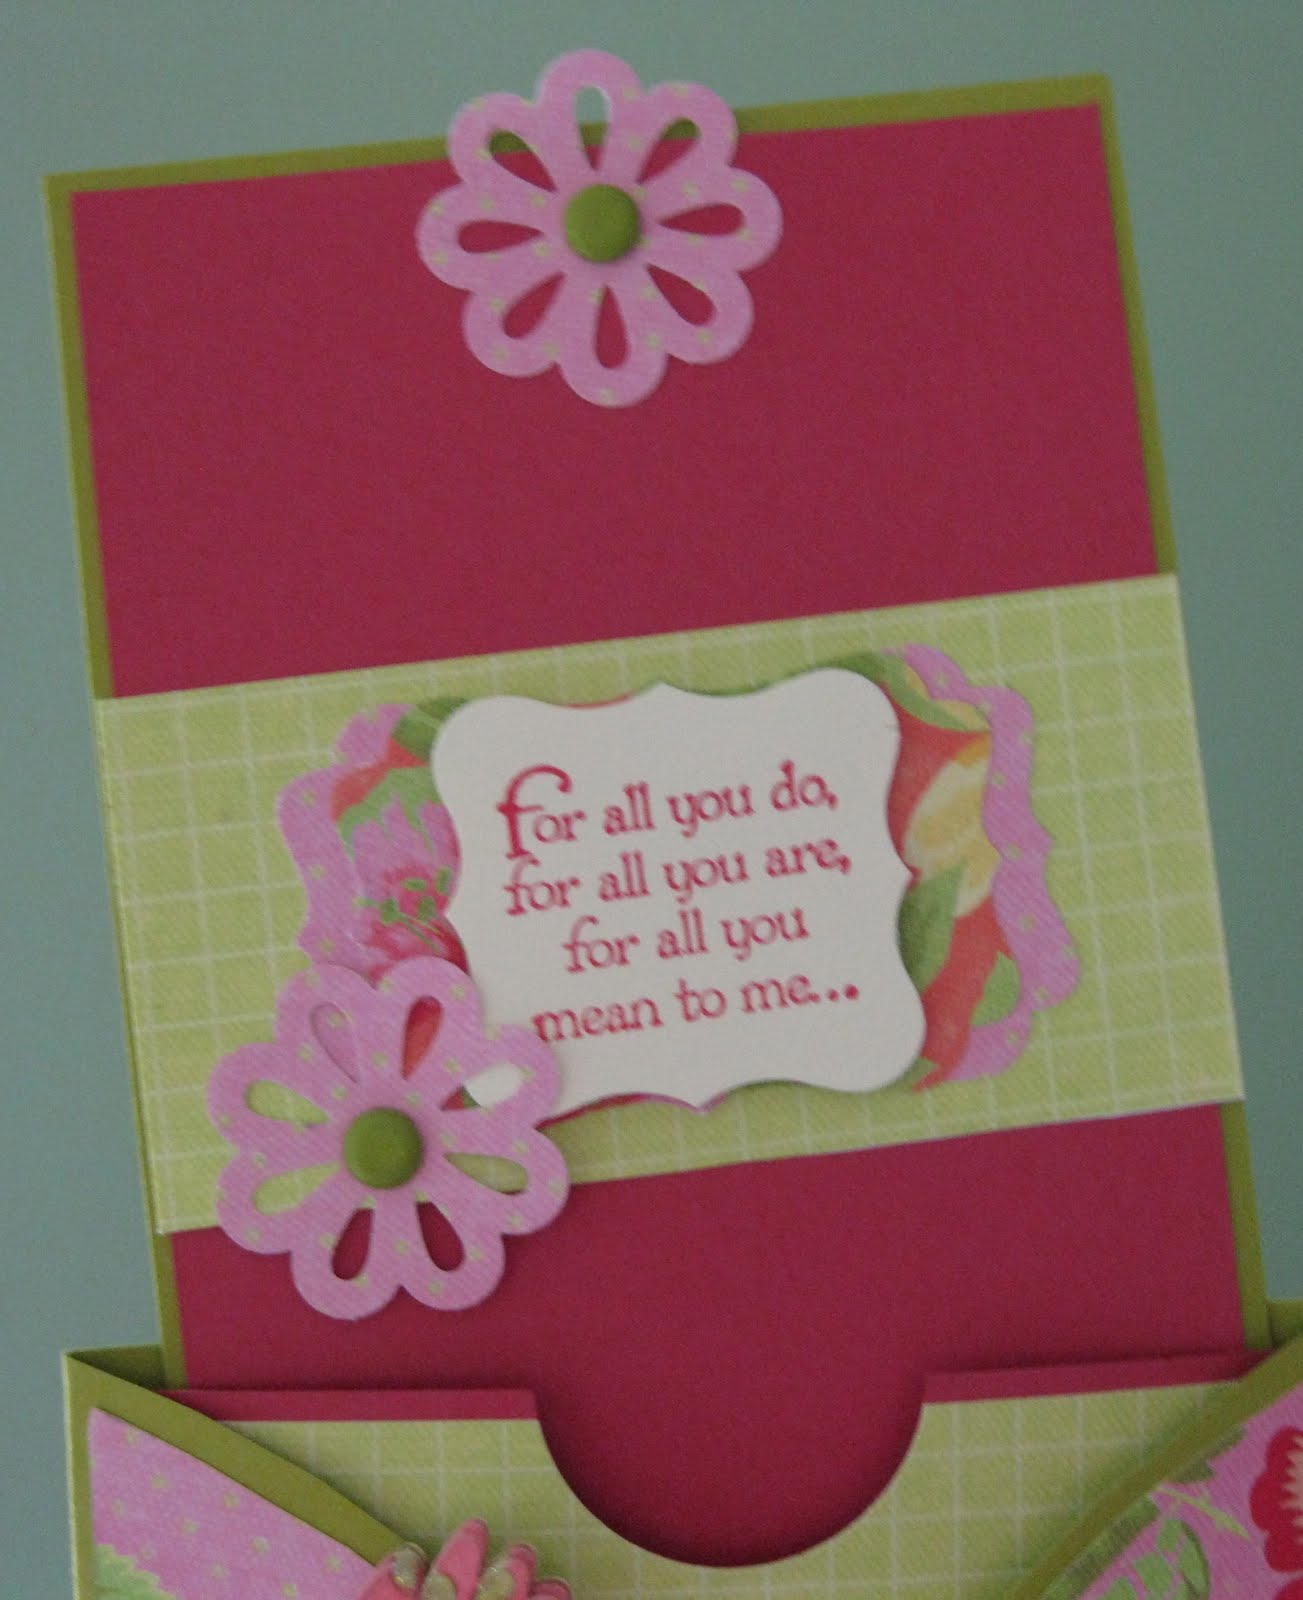
 Then I decided I wanted to make my own template to make a full-sized card.  Here is that one.  Again Olive and Rose Red and Pink Pirouette were used.   I used a plate or lid or something to cut the half circle (I forget what).  You can use anything to make a half circle for the sides on this one.
This one has alittle more inside because it's a bigger card and there's more room.  I used the Decorative Label punch topped with the Curly Label punch for the sentiment.  That quote is from the For All You Do set.
 Here is a close-up of that label and sentiment.
And finally, I decided why do we need to pull out that center.   So I made this one.  For it, you have to untie the ribbon, but no matter.  This card uses the Tangerine Tango cardstock for it.
 Inside I decided I wanted a sentiment but also room to sign it, so I made two areas for that.
                                     
 I used the Decorative Label punch for the backing and the Wide Oval punch in whtie for the sentiment.
There's plenty of room here for you to sign your name. 

Hope you like these three.  Come back soon, OK?
Smiles, Laura

Sunday, June 5, 2011

Tiny Cup...

 I shared this layout with you back in March, but with different colors and stamps.  I just love this layout!!

This card is done in Baja Breeze, Tangerine Tango, and Not Quite Navy.  I matched the designer paper (non-SU).    I just love this little cup from Tiny Cup and it's always nice to put a "HELLO" on the front of  a card.
 Here is my sentiment.  That's the Scallop Oval in Not Quite Navy, the large oval in Tangerine, and HELLO is on Baja Breeze cut with the end of the Decoratie Label punch.  I think I've shown that tip before.
 For the cups, I stamped all three separately, cut them out and fixed the rim so they fit one inside the other, like stacked cups really do. 

We all need cards to send just to say hello and this one fits the bill!!
Thanks for visiting my blog today. 
Smiles, Laura

Friday, June 3, 2011

More On the Grow flowers....

Here is another card I made using the flower from the On The Grow set.  It is really a fun one to stamp and color!  I used Poppy Parade and Tempting Turquoise cardstock on this one, with designer paper from the Build-a-Bear Workshop Pawsitively Prints II pack and the In Colors Patterns Stack.  I am so glad the Patterns Stacks are not retiring!!
 Here is the sentiment on this one.  I used the turquoise circle, the Designer Label in Poppy (that one is retiring, too, and will I ever miss it!!) and the large oval.  The sentiment is from the On the Grow set, too.
Here is a closeup of the flower and ribbon.  Yes, that's retired Riding Hood Red ribbon.   It goes with the poppy cardstock and I wanted to use taffeta ribbon on this one.
                                     

The main thing I like about this one is the layout.  You know how I'm always looking for neat layouts. This one could be used with ANY image and sentiment. 

Thanks for stopping in today!!  See you another day!
Smiles, Laura

Wednesday, June 1, 2011

On the Grow Flowers....

My friend Judy and I were playing with layouts the other day and here is one we saw that we wanted to try.  I like how the two designer papers weave into each other. 
I stamped this jar of flowers from the On the Grow set on a circle and colored them with markers.  You probably cannot see it but I dabbed some "stickles" onto the centers of the flowers. The jar itself is colored and then coated with Crystal Effects so it shines like a real jar. 
                                        
 I thought it needed something where the four strips of designer paper wove together, so I put 1/2" circles and brads on the four places they cross. 

The bow above the circle just finishes it off.  I hope you like this one!!

Have a great day and stop in again soon!!  Smiles, Laura