Wednesday, November 30, 2011

Comfort and Joy....

I've been absent a few days.  We had a rather sad Thanksgiving.  My step-mother had been in declining health for some time and was in Hospice care. She passed away Thanksgiving afternoon.  Such a sad time for my dad--for us all.  My husband and I were there with Dad and with her when she slipped away.  So I've been out of town with family since last Wednesday.  I am glad to be back with you all and back into my own routine.

Here is a card I made recently using the Stars die.  The card itself is Concord Crush cardstock, layered with Brushed silver and topped with Wisteria Wonder that I ran through the Snow Burst embossing folder.  
I punched the stars from Silver glimmer paper that I had torn the back layer of paper off--so it was not as heavy.  I embossed the sentiment (from the Word Play stamp set) on Concord Crush cardstock with silver embossing powder.  I punched this out with the Decorative Layer punch.  I backed the with brushed silver card stock also punched with the Decorative Layer punch.  The very smallest star on the "JOY" and on the card was punched using a little punch I had on hand.

Hope you enjoy this one!  Thanks for visiting!  Smiles, Laura

Thursday, November 24, 2011

Woven Ribbon....

I saw something in a stamping magazine the other day that inspired this card.  The person had woven either ribbon or designer paper (I can't remember which) and covered the front of a card.  I decided to give it a try.

This card is white, layered with Basic Black cardstock that I wrapped the Stampin' Up! 1-1/4" black and white striped grosgrain ribbon around.  I used 3 pieces horizontally and 4 pieces vertically and wove them together.  I then glued them around the black cardstock and added a red satin ribbon.
For my sentiment, I used a stamp from the Perfect Punches set.  I stamped it in Black and Red (twice) and then punched the various circles out and the scalloped circle out and glued 3 layers--red, then black,then red.  I like this touch on the card!
I hope you all have a wonderful Thanksgiving.  I have shared all my fall/grateful cards, so you get a Christmas card on Thanksgiving.  Such is life.  We are spending Thanksgiving with my dad, so I'll get back to you on Monday!
Thanks for visitng!
Smiles, Laura

Tuesday, November 22, 2011

Snow in Capital Letters....

I love using letters to spell out words on cards.  These letters from the Serf Essentials Alphabet die set are LARGE, but I like using them occasionally. 

For this card, I ran the Baja Breeze card (the front half) through the Big Shot using the Snow Burst embossing folder to give it texture. 
I wanted the snow letters to have some sparkle to them, so I used my two-way glue pen on some areas of the letters, then dipped them in Dazzling Diamonds glitter.  Love that effect. You can see it a bit in this picture.
                                    
This shot also shows the individual snowflakes I added.  I used the Silver Glimmer paper for them.  First I peeled the back layer of paper off it, then ran the paper through the Big Shot with the Northern Frost die.  You might need to use a shim to get it to cut totally through the glimmer paper.  But the results are worth it. 

No, I'm not looking for snow yet, but I am about ready for the holidays to be here.  Hope you are too!!
Thanks for visiting my blog today!  Smiles, Laura

Thursday, November 17, 2011

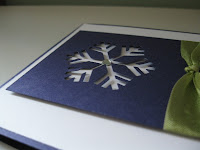
Single Snowflake....

Is this an elegant card or what?  Sometime I make a card that I just KNOW will be a hit.  We are making this one in class this month and we all loved it. 

The card is made from Concord Crush cardstock.  I layered that with Whisper White with the sentiment stamped on it.

Next I cut a rectangle of Concord and punched a snowflake out using the Snowflake punch.  It looks like there is a white snowflake glued onto the concord card, but no, it's punched out. 

I popped up the small  Concord card on the front of the white cardstock and glued one large rhinestone jewel in the middle of the snowflake. The small Corncord card part has a Pear Pizzazz ribbon tied around it.
Here is a close-up of the snowflake so you can see how popping it up allowed you to see under it a bit.
This shows the rhinestone in the center.
My class agreed this is the ideal Christmas card:  it is elegant, yet simple enough that you could make a BUNCH of them pretty quickly.  That's what we all want, right?

Come back to see me again soon!! Smiles, Laura

Tuesday, November 15, 2011

Christmas Tree lights....

What can I say?  I LOVE this card!!  I've shared this "funky folds" layout several times.  I just had to use the Stocking Accents die to make some lights to put on this card. 

My card is made from Cherry Cobbler cardstock.  I layered Wild Wasabi on the front of the middle. That dotted paper is from the Holly Berry Bouquete series.
The bulbs are cut from Daffodil Delight, Pumpkin Pie, Old Olive, and Tempting Turquoise cardstock. I sponged color around the edges of each one to give it the illusion of dimension.  But I also popped them up on the "string"  That black string is just drawn on using a black pen.  I used brushed silver cardstock also cut using the Stocking Accents die for the tops of the bulbs.
The sentiment is from the Petite Pairs set.  I layered the large oval onto a Daffodil tag cut from the Lots of Tags die set.
Here is a side view of the "funky folds" card opened up.  I think anyone would love this card!  Here is the "how to" picture I shared back in February  to show you how to make this card.
Isn't it fun!! Got out and make your own now. 
Thanks for coming by today.  Smiles, Laura

Sunday, November 13, 2011

Let's go four wheeling....

We always need a masculine card, don't we? Well, this one fits the bill.  The card is Early Espresso.  I layered it with Not Quite Navy that I ran through the Square Lattice embossing folder. 

I took a 3" Cajun Craze square and cut it in half diagonally.  Then I layered it with triangles of the Well Worn designer series paper.

The center 4-wheeler is from the Need for Speed stamp set.  That is a wonderful set because it had a fast boat, car, plane and 4-wheeler---all great for cards for men and boys!  I colored it with my aqua painter and ink pads.
The sentiment "spoil yourself today" is from the Bring on the Cake stamp set.

Thanks for stopping by today!! Smiles, Laura

Friday, November 11, 2011

Gold Fall Leaves....

Recently during one of my days devoted to stamping, I went back to the main reason I started stamping in the first place---gold embossing!!  About 12 years ago, a few friends and I got together to stamp with the few stamps we all had.  At that time, I thought any card that was pretty had to have gold embossing on it. 

Once I found Stampin' Up! and their beautiful stamps and paper and ink, I dropped that embossing thing and now hardly ever emboss.  That back then, I loved gold embossing. 

So this card has leaves embossed with gold embossing powder and then colored in with my aqua painter and SU inks.
This is the Gently Falling set which I've used on my blog several times.  The card itself is More Mustard cardstock, layered with Soft Suede and then the leaves are embossed on Very Vanilla.

I put ribbon around two opposite corners for alittle added interest.
Here is another card I made the same day.  It, too, has gold embossing but not so many leaves.  And the ribbon is just tied around the card.
Both of these cards would make great fall cards to send to someone to whom you want to express gratitude.

And I'm thankful to you for continuing to visit my blog! Come again soon!
Smiles, Laura

Tuesday, November 8, 2011

Day of Gratitude Again....

Today I'm sharing another card I made using the Day of Gratitude stamp set.  this card is made using More Mustard, layered with Soft Suede.  I ran the suede through the Square Lattice embossing folder.  I punched a long piece of Cajun Craze with the Lace Ribbon Border Punch to put down the left side of this card. 
I told you on my November 2 entry how to make this medallion.   Go back to that entry to see how.
I embossed the sentiment in white for the bottom of this card. on Pear Pizzazz, then punched it with the Wide Oval Punch.  I layered it on a Decorative Label punch from mustard cardstock.

I think this one will be a hit!  See you soon, I hope!
Smiles, Laura

Monday, November 7, 2011

Two Candy Canes

Today we are going to use the Stocking Accents die again to make candy canes.  This is another fun one.  This card uses Real Red and Old Olive, including the designer paper from the Brights Patterns DSP Stack. 
I told you in my last entry how to make the cnady canes--cut a red and a white one, and glue every other section of the white onto the red.  (The die has perferations to showing where to cut.)  I crossed these two and tied a ribbon around them both.
This sentiment is from the Occasions Alphabet set.  I stamped it on white and punched it with the Scallop Oval punch, then layered that onto a Wide Oval punch in olive.
I added three little rhinestone jewels at the bottom for "bling".

I'll be showing some other cards made using the Stocking Accents in the near future.  Visit often!!
Smiles, Laura

Saturday, November 5, 2011

Candy Cane Fun....

I bought the Stocking Accents from the Holiday Mini and have had so much fun playing with it. Here is a cute candy cane card I made using the die.  We made this card in class and my customers thought it was a bit of work, but you can make these while you watch TV one evening.

Let's talk about the background on this one.  One day when friend Judy and I were stamping, we used some non-Stampin' Up! paper to "try" this card.  I had this designer paper on hand and used it.  But for class I wanted to use Stampin' Up! paper.  So for this card, first I stamped the little red images on Baja Breeze paper from the Subtles Patterns DSP Stack using the French Foliage set.  Then I ran it though the Perfect Polka Dots embossing folder and then I sanded it with a sanding block.  Look closely at these two cards.  Doesn't the "created" paper give the same effect as the original designer paper?
Here is a close-up of the sentiment from the Teeny Tiny Wishes set.
Now here is the candy cane.  For it, you need to cut both a red and a white one using the die and Big Shot.  Then cut off every one white one and glue it onto the red one.  That's what I meant about doing this while you watch TV or some other activity.  I tied a Baja Breeze seam tape ribbon around it.
Some might not think the Baja Breeze is a "traditional" Christmas color, but I like this card!! 

Well, more later.  Have a great day and come back soon!!  Smiles, Laura

Friday, November 4, 2011

Grateful....

Here is a card I made the other day using Pear Pizzazz layered with River Rock.  I topped that with this delightful designer paper from the Spice Cake collection. 
For the sentiment, I used the oval from the Designer Frames embossing folder set with Pear and cut around it.  I love how it has those raised dots and WISH we had an oval die or punch that would punch it out.  But I cut it with scissors.  Then I punched out a River Rock oval using the Wide Oval punch.  I inked the "Grateful" word of the "Grateful Greetings" stamp from the Grateful Greetings stamp set (I know, that's alot of GRATEFUL) with my Always Artichoke marker and stamped in.  It is on vanilla cardstock.  Then I punched it with my Decorative Label punch.  I reinserted the cardstock in the punch, just barely in, and punched it again to make a narrow label.  Love it!!
I cut a small snip of Victoria Crochet Trim and attached it to the edge with a Green Circle Ice Rhinestone brad.  Hard to see that green here, but it shows up well in real life.

This isn't a hard or complicated card, but a nice one to send to someone to express your appreciation for them.   And I appreciate your visit to my blog today!!
Smiles, Laura

Thursday, November 3, 2011

Green Pear....

Here is a card I created recently using the hostess set, Faith in Nature.  Everyone seems to love this set.  I used the pink and green designer paper from the Letters to Santa pack.  Yes, honest, it does have this pink and green paper in it.  I couldn't see it on a Christmas card, but could on this one.
Here is the pear.  I colored it green---yes, all the pears I've been making pear preserves from have been green, not yellow.  This card is Lucky Limeade and I used Blushing Bride with it.
You can see here that I embossed the background pink using the Houndstooth embossing folder.  Love that new one!
Thanks for checking out my blog today.  See you soon!! Smiles, Laura

Wednesday, November 2, 2011

Day of Gratitude....

Did you notice my new banner photo?  I put several cards on it, including the one I'm sharing today.  I love this Day of Gratitude medallion.  I saw one colored similar to this one on Regina Andari's blog and found out later she made if using MDS.  Mine is stamped with VersaMark ink on white cardstock and embossed with white embossing powder.  Then I "burnished" it using sponge daubers with four colors--Pear Pizzazz, Cajun Craze, More Mustard, and Soft Suede.  Then I cut out the medallion to put on this card.  This card using the "funky folds" layout I've shared with you before.  Check some of my earlier entries for instructions.
Here is a close-up of that medallion
I love the fall colors on this one.  And that sentiment from the Days of Gratitude stamp set. 

Thanks for stopping by today.  I'll have more fall samples to share in the days to come.
Smiles, Laura