Tuesday, March 15, 2011

Welcome, Izzy....

I have a new granddog.  Her name is Izzy (Isabelle Chevelle) and she's about 8-1/2 weeks old.  My son and his wife are totally taken with her and she is a CUTIE. 
She's half pit bull and half bull dog and she's probably going to be a pretty hefty girl. 
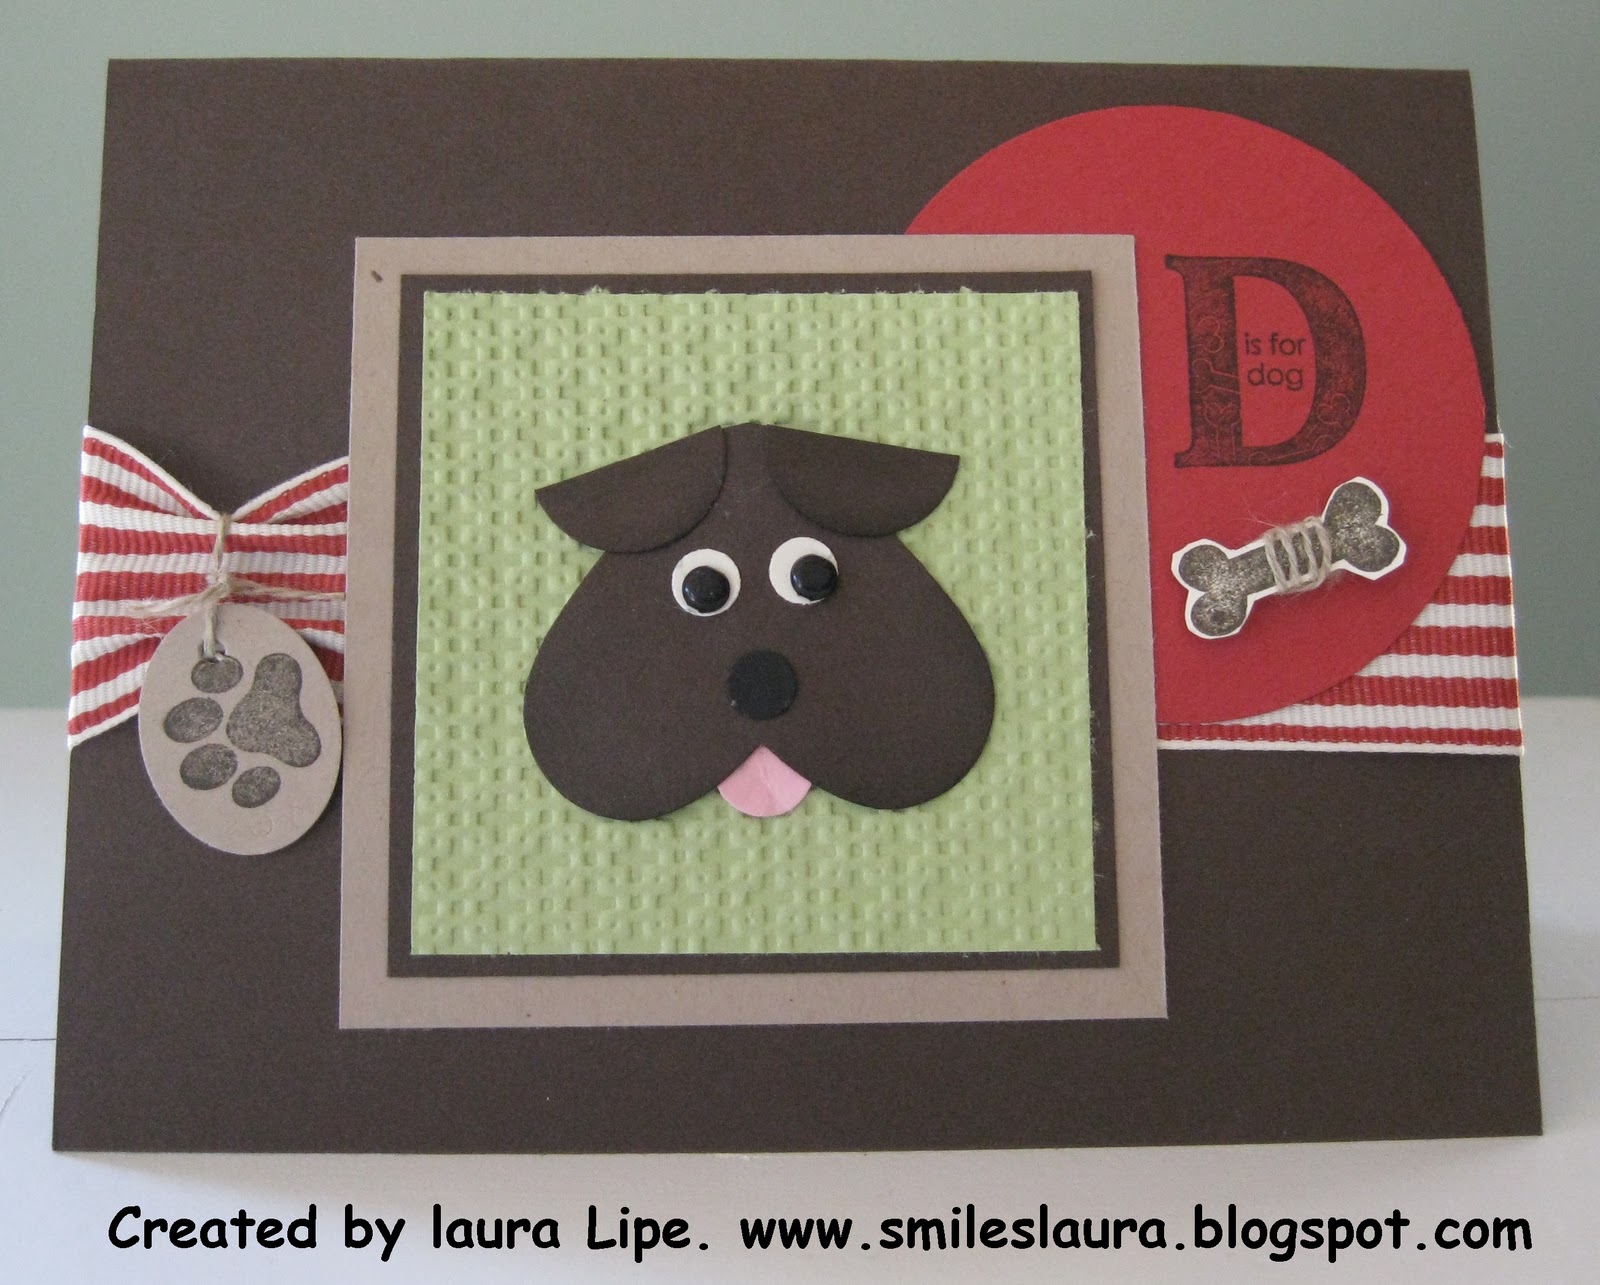
Here she is on her first walk outside on her leash.  They want to socialize her so she is a "good girl"  I bought her the first "bed" ---let's hope she doesn't chew it up.  I wanted to send them a "welcome baby" card, so here's what I made for them.
You know I love punch art, so I had do try to make a dog that looks like Izzy.  I guess my head isn't long enough, but I tried to get the hanging jaws she'll have especially as she gets older. 
I used the heart punch for her face and the 3/4" circle punch for the ears.  Her eyes are black brads. and the tongue is a circle from the 2-Step Owl punch.  Inside I stamped "Welcome Baby" and wrote Izzy after that.

I hope they like the card when they see it today!  We will be seeing alot more of Izzy, I think!
Smiles, Laura

Monday, March 14, 2011

Leprachaun.....

I've shared this Funky Folds card with the little Leprachaun on some of my yahoo groups and am getting requests to put him here on my blog and show how he's done.  I made this card for friend Rose as my swap in a St. Patrick's Day challenge.  I got inspriation from Ellen Kemper and Samantha Parisi from their leprachauns.  Rose always compliments me on my punch art so I thought I'd make this fellow for her.  She seemed to like him!

OK, so first I'll tell you how the leprachaun is made.
           
I used the following punches for various parts of him:
Head: Ornament punch
Hair:  Scallop Circle punch, cut in half
Mustache:  5-Petal Flower punch
Hat:  Word Window and 1-1/4" circle punches
Body:  Wide Oval punch
Arms:  Large oval punch
Belt:  Word Window and Slot punches
Boots and Shamrock:  Heart to heart Punch
Legs:  Large Oval Punch
Nose, eyes,and ears:  1/4" circle punch
Outer eye:  2-step Owl Punch

Here is a picture of the card opened up:
This is called a Funky Folds card and I've posted instructions for making it before, but here they are again:
I hope you can figure out how to cut and score the card from this picture.  You can scroll back in my entries and see other cards made using this layout.  This is really a fun card!  I hope you all enjoy him!

Smiles, Laura

Two more twisted easel cards.....

I don't think I've shared this little love bug with you.  I made this one for Jessica's Valentine.  She just loved him.  I saw him on Creations on Paper blog and fell in love with him.  He wasn't on a card, but I knew he'd be perfect for an easel card.
I gave you the directions for an easel card yesterday so I'll tell you want punches I used to create the cute love bug:
Back--1-3/4" circle
Belly--Large and small oval punches
Arms and Legs--small oval punch
Feet--1/2" circle punch
Mouth (top and bottom)--3/4"x15/16" oval punch carried over from Holiday mini
Tongue--3/4" circle punch (I think)
Eye balls--3/4" circle punch
Eye --1/4" circle punch
Top of head--small oval punch
Antenna--large oval punch
ends of antenna--1/4" circle punch
I hope you can figure him out and make one yourself!

Here is the inside of the card:
I used the Red glimmer cardstock for the hearts.

Here is another card I made for Valentines in the same easel layout.

And here is the inside:

I made this one for my friend Judy's husband to give her for Valentines Day. 

See there are so many ways to use this twisted easel card.  Enjoy!!!   Smiles, Laura

Sunday, March 13, 2011

One last Petal Pizzazz.....Twisted Easel....

OK, I admit I've been showing you alot of Petal Pizzazz and with the same flower from the set.  There are several flowers (five of them, I think) in the set and I've been leaning heavily on this one flower.  I promise to use some of the others to show you in the future.  But honestly, you could do the cards I'm showing you with any of the flowers. 

This card is called a twisted easel.  Here is the front of the card.
When you open the card, here is how it looks:
The card itself starts out as a 8-1/2" x 4-1/4" card, folded in half to make a 4-1/2"x4-1/2" card.  Put the fold on the left side and then score from the lower left of the front near the fold to the upper right corner.  This made the fold where the card props open. 

This card is Poppy Parade and I have poppy and Peach Parfait flowers on the front.  Some ladies are putting a full sheet on the front which covered up the nice triangle.  I put a small sheet with my flowers so that my triangle shows.  I like that.  The designer paper used on this one is from the Patterns Paper Stack in the In Colors.

This card looks complicated, but is really an easy one to make.  Try it and see how you like it!
Thanks for visiting today.  Smiles, Laura

Saturday, March 12, 2011

On a Petal Pizzazz roll.....

I guess you'd say I'm on a Petal Pizzaz roll---and I seem to be using the same flower in that set on my cards.  But I have these samples so I cant to show you.  I like to show my customers more than one card using a stamp set, especially an expensive set like this one, so they will have lots of ways to use it.  Here  is a card where I used Tangerine Tango, Daffodil Delight, and Rich Razzleberry for the flowers and also for the scalloped cardstock. 
The card itself is white and I tied a Rich Razzleberry ribbon around the card.  I stamped "sweet friend" from the Hello You stamp set.  I am not sure if you can see it, but those are Pearl Jewels in the center of each flower.

Here is another card I made with the set:
This card is Marina Mist, and I used Tangerine Tango, Daffodil Delight and Marina Mist for the flowers.  Again, I used the Hello You stamp set on this one. 

There are so many ways to use this stamp set.  I have one more to show you on my next entry.  Come back again, OK?  Smiles, Laura

Thursday, March 10, 2011

More Petal Pizzazz.....

Today I wanted to show you a card we made in my class this week which uses the Petal Pizzazz.  Did I say I LOVE this set??  I do!

The card is Pear Pizzazz and I used designer paper from Sunny Garden on it.  What happy paper that is!

I stamped one of the flowers from the Petal Pizzazz set in Peach Parfait, Daffodil Delight, and Poppy Parade. I punched them out with the Scallop Circle punch.   The leaves are from the same set and are stamped in Pear Pizzazz.
                      
For the center, I used the Scallop Circles #2 to cut the Whisper White cardstock.  I stamped "Hello, You" from the Hello You set in Poppy Parade.
Here is a close up of the flowers and sentiment.  I put a Rhinestone Jewel in the center of each flower.  I think this makes a happy card, suitable for almost any occasion.

Last August I made this card (below) using designer paper that has now retired.
I love the colors in it, too---Tempting Turquoises, Pumpkin Pie and Rose Red.  I didn't get to demo this card before the designer paper retired.  I show it to you because it demonstrates that you can use almost any colors for this card!

Thanks for stopping by today.  Smiles, Laura

Tuesday, March 8, 2011

Tri-Steps Card....

Today I'm going to share with you a card made with a layout that came from Pat Huntoon's Technique Junkies Techniques CD.  I made this one with our stamping club last night and I think everyone enjoyed having a new cut and fold to learn.  Here is my front.  I used Peach Parfait, Poppy Parade, and So Saffron  for the cardstock.  That's Sunny Garden dotted designer paper on the front.  The flowers are from the Petal Pizzazz stamp set.  Love that one!!!  And the sentiment is from the Upsy Daisy stamp set.  I used the scallop circle punch to punch out the flowers, and put a rhinestone Jewel in the center of each.
 Here is the insdie.  I decorated the left half of the inside with So Saffron cardstock and left the right half plain.
 In this shot (below) you can see the 3 steps, hence the name, Tri-Steps.  I lined each one with striped desiger paper so they show up well.
 Here is another card I made using the same cuts and folds (and don't worry, I have directions below).  I used the stamp set Great Friend on this one--the butterfly and the sentiment.
 Here is the inside of the second card.  I lined the left and right sides of the inside with designer paper and I put punched butterflies on the steps.
NOW, I know you've been wating---here is how you make this card.  I have tried to explain with words (not just the drawing) how to do the cuts and scores.  So please start on the left and follow the directions.  The beginning cardstock size is 5" x 10".  I do not have it on the written instructions, but you need to score on the LONG wide at 4" to make the front of the card fold over.  Then go ahead with the instructions for cutting and scoring the rest of the card.
Let me know if you run into trouble with this one and I'll try to help.  Tomorrow I'll share another card made with this same layout/technique.

Thanks for visiting today!!  Smiles, Laura